

Key Takeaways:
- Over 70% of viewers will immediately click away from a video with poor, distorted audio.
- Learning how to remove background noise from video is the quickest way to boost viewer retention.
- Applying simple video noise reduction strategies can make budget microphones sound incredibly professional.
- Improving video quality on YouTube involves using crisp audio and high-resolution visuals.
- You can easily remove background noise from YouTube video files that have been baked into them using free or accessible AI tools.
- Discovering how to get better quality videos on YouTube comes down to a mix of proper export settings and clean audio mixing.
Why Removing Background Noise Matters for YouTube?
Background noise refers to unwanted sounds that interfere with your main audio. Since audio quality directly affects performance, poor audio reduces retention. Further, Lower retention reduces watch time. Further, Lower watch time limits recommendations. Refining sound quality is one of the easiest ways to improve YouTube video quality and increase engagement. If you’re trying to grow your channel, you already know you’re competing against 20 million daily YouTube uploads.
You might have the best lighting, a top-tier camera, and an incredibly engaging personality, but if your audio is disrupted, you’ll see a significant drop in audience engagement. Hence, learning how to remove background noise from video is arguably the most crucial editing skill you can learn.
In the end, removing background noise from video instantly improves your content. If you want to improve video quality on YouTube, you have to start with your sound. Hissing, humming, air-conditioning drones, and traffic sounds distract the viewer from your message.
Easy Ways to Remove Background Noise from Video
If you want to remove background noise from a video without spending hours fine-tuning equalizer settings, you are in luck. Modern editing software has made video noise reduction incredibly accessible. Here is how you can clean up your audio and remove the background noise that YouTube video files might be plagued with.
Using AI Audio Enhancers
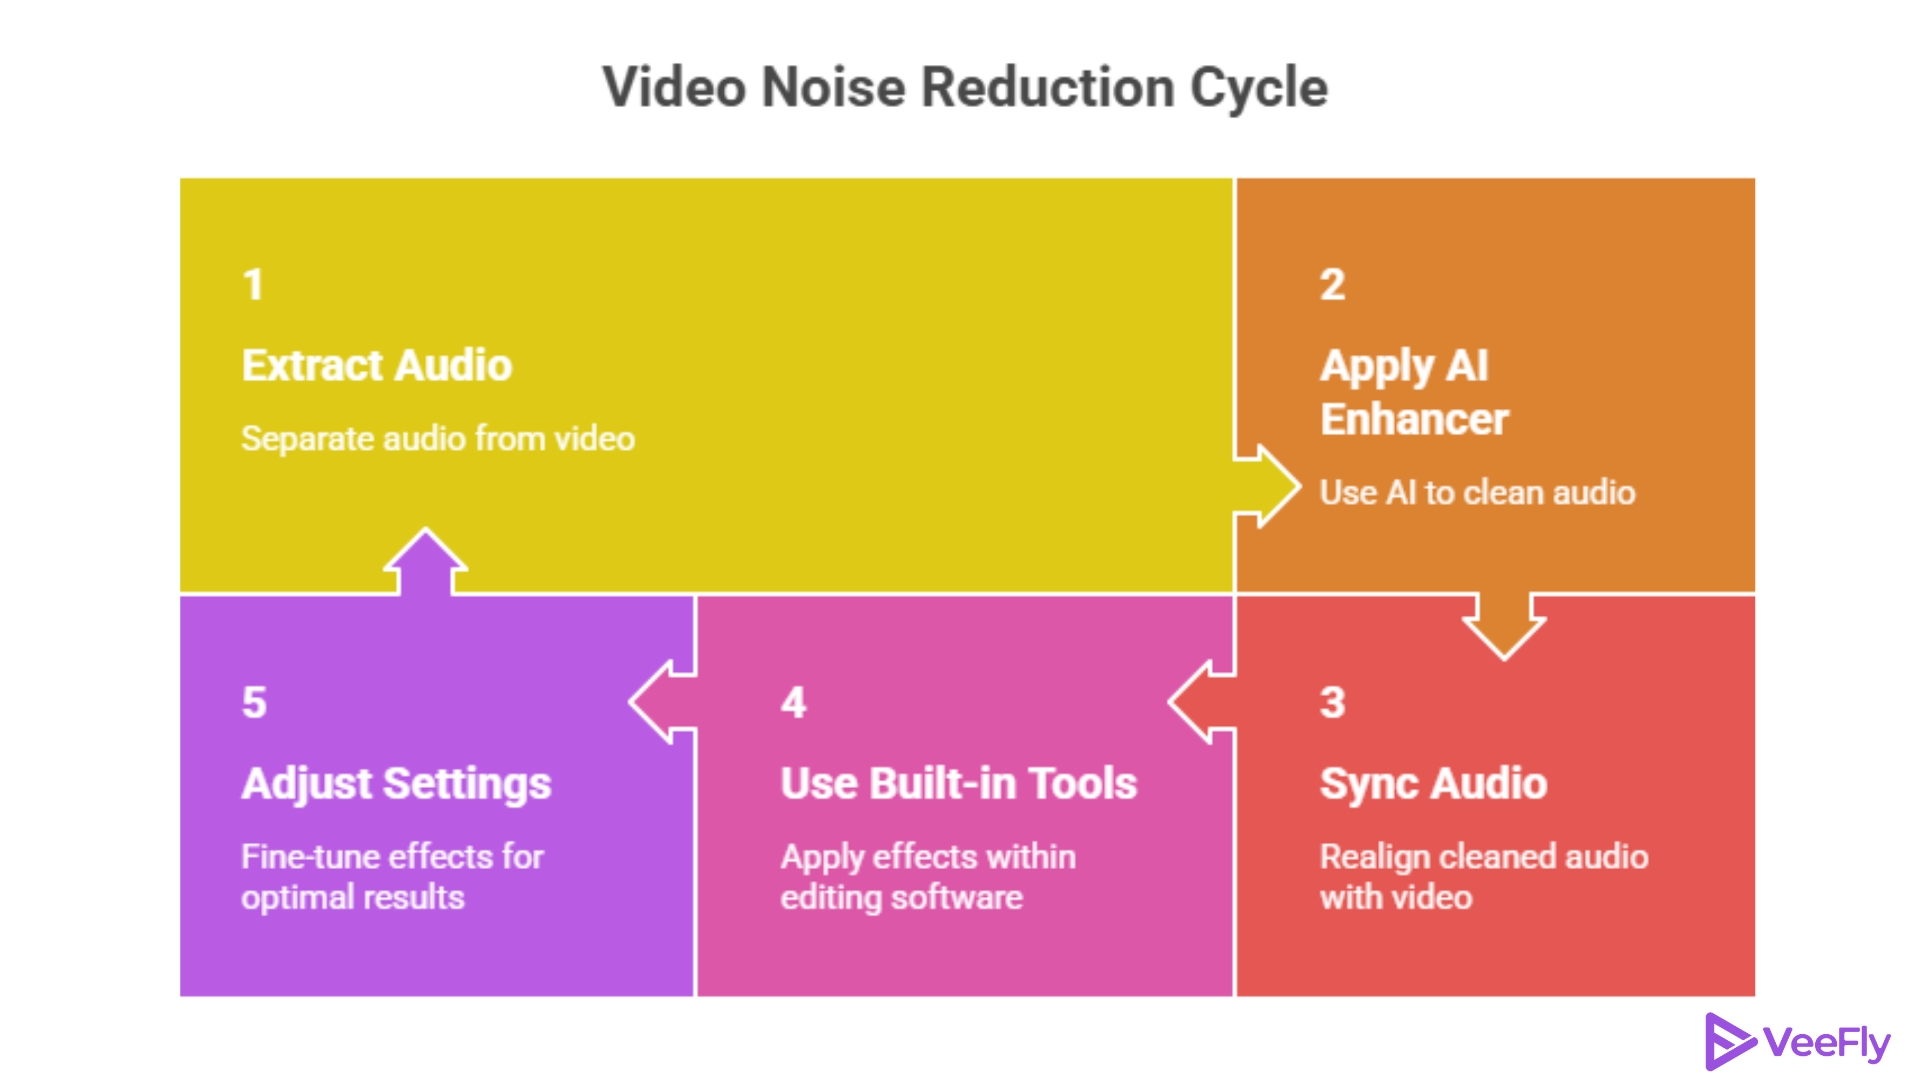
The absolute easiest way to remove background noise from a video is to use AI tools like Adobe Podcast AI or DaVinci Resolve’s Voice Isolation feature.
- Step 1: Extract the audio file from your video clip.
- Step 2: Run the audio through an AI vocal enhancer. These tools examine the track and automatically apply powerful video noise reduction.
- Step 3: Sync the newly cleaned audio back up with your video timeline.
This simple process is a massive secret for creators wondering how to improve the video quality on YouTube. It takes seconds but makes a monumental difference.
Using Built-in Editing Tools
If you prefer to stay inside your editing software to remove background noise from video, most modern Non-Linear Editors have fantastic built-in effects.
- Premiere Pro: Search for the DeNoise effect in the Audio Transitions panel. Drag and drop it onto your audio track. In the effect controls, you can adjust the slider. Don’t push it too high, or your voice might sound robotic! This is a classic method for reducing video noise.
- CapCut: Select your video clip, navigate to the audio tab, and simply toggle on the Reduce Noise button. It’s a one-click solution to remove background noise that YouTube video creators love for fast turnarounds.
Removing Background Noise: Beginner Method
This method works best for creators who want quick results with minimal effort.
- Step 1: Upload your video to a noise removal tool.
- Step 2: Let the system analyze the audio.
- Step 3: Apply automatic noise reduction.
- Step 4: Preview and adjust if needed
- Step 5: Export the cleaned video.
How to Improve the Video Quality on YouTube?
Once you have removed background noise from a video, consider its visual quality. Audio is crucial, but visuals complete the experience. Improve YouTube video quality with these essential steps.
1. Improve Your Export Settings: Creators often edit great videos only to see them look compressed online. Export using H.264 or H.265, match bitrate to YouTube’s recommendations (8-12 Mbps for 1080p), and consider upscaling to 4K for better codec quality and fewer artifacts.
2. Lighting and Camera Basics: Optimize lighting before recording for better video quality. Face a window or use a ring light for bright footage. Shoot at the lowest ISO to reduce grain and prevent visual noise with proper lighting.
3. Recording tips: Achieve better YouTube video quality by combining well-lit visuals with clear audio. Record in a quiet environment, use directional microphones, and minimize post-processing needs.
4. Avoid Unnatural sound: Over-processing, ignoring noise, or using poor microphones can distort audio. Focus on prevention during recording. Key takeaway: Prioritize audio clarity and prevent distortion through careful recording.
5. Use Dedicated Audio Software: Specialized audio tools enable precise adjustments, removing hiss, reducing echo, and balancing clarity. This is best for voice-heavy content. Use dedicated software for advanced audio control in podcasts and interviews.
Final Thoughts
Growing a channel takes time, but upgrading your technical skills doesn’t have to. By taking a few extra minutes during your editing workflow to remove background noise from video, you show your audience that you respect their time and attention. Whether you use a one-click AI tool to remove the background noise that YouTube video files struggle with, or manually apply video noise reduction in Premiere Pro, the results will speak for themselves.
Remember, when you ask how to improve the video quality on YouTube, the answer is twofold: tackle the sound, then tackle the visuals. Consistently applying video noise reduction to your tracks and dialing in your 4K export settings are proven ways to improve YouTube video quality. Keep creating, keep refining, and you’ll quickly master how to get better quality videos on YouTube!
Frequently Asked Questions
Q1)How do I easily remove background noise from a video?
Use CapCut’s “Reduce Noise” or Premiere Pro’s “DeNoise.” For tough cases, free AI tools like Adobe Podcast can remove all background noise and boost your voice quickly.
Q2)How to improve the video quality on YouTube after uploading?
You can’t change the source file after uploading. To improve YouTube quality, use a high export bitrate and try 4K upscale before uploading.
Q3)What is the best method for video noise reduction?
The best noise reduction depends on your budget and the software you choose. Built-in NLE audio effects work for quick fixes. For top results, use dedicated AI vocal-isolation software or plugins like iZotope RX.
Q4)How to get better quality videos on YouTube without buying a new camera?
To improve YouTube videos without a new camera, focus on lighting and audio. Use a cheap softbox to reduce grain and remove unwanted background noise. Good lighting and clear audio can make smartphone videos outperform poorly managed cinema footage.