
- Learn the viral time travel video effect to hook viewers instantly and tell unforgettable visual stories.
- Video editing is not just a series of technical software clicks; it is an exercise in narrative control.
- Many casual creators add a basic transition to a clip and wonder why watch time stays flat.
- The difference between an amateur project and a high-performance visual asset lies in the storytelling context.
- When you execute a time-travel video effect well, you create a strong retention mechanism that taps into the human craving for transformation, contrast, and resolution.
- To stand out on crowded feeds, move beyond the basic visual filters. Treat video transitions as tools for directing attention.
What Is a Time Travel Video Effect?
Why Time Travel Effects Work So Well on YouTube
How to Create a Time Traveler Effect: Step-by-Step
Step 1: Plan Your Scene
- Actionable Tip: Sketch a simple two-panel storyboard defining exactly where you will stand in the frame during both segments to ensure your body positioning aligns.
- Common Mistake: Picking an abstract, ambiguous concept that requires long sentences of text overlays to explain to the viewer.
Step 2: Record Two Timelines
- Actionable Tip: Keep your studio’s baseline ambient lighting identical across both shoots unless a dramatic lighting shift is an intentional part of the plot.
- Common Mistake: Bumping or shifting the tripod legs between takes, which completely destroys the alignment of your background assets.
Step 3: Import and Align Your Clips
- Actionable Tip: Trim away any empty visual space at the absolute beginning of your files to keep the video’s opening pacing incredibly fast.
- Common Mistake: Shifting the tracks slightly out of sync, which creates an awkward physical jump when the transition executes.
Step 4: Add a Linear Mask
- Actionable Tip: Apply a subtle 5% edge feather to the mask boundary line to blend the lighting profiles of the two clips smoothly.
- Common Mistake: Leaving the mask line completely harsh, which makes the edit look unpolished.
Step 5: Sync Movement with Keyframe Animation
- Actionable Tip: Apply an “Ease In” or bezier curve setting to your keyframe tracking to make the movement look incredibly fluid.
- Common Mistake: Animating the mask movement too slowly, which stalls the video’s pacing and drops retention.
Step 6: Inject a Strategic Time Travel Sound Effect
- Actionable Tip: Lower the volume of your primary background music track by 6dB during the warp effect to let the sound design command the user’s attention.
- Common Mistake: Relying purely on raw recorded phone audio, which kills the professional value of your YouTube Shorts effects.
Step 7: Export and Optimize for YouTube Shorts
- Actionable Tip: Select the exact frame in which the mask line crosses the center of the screen as your custom thumbnail preview in YouTube Studio.
- Common Mistake: Exporting in a horizontal 16:9 box, which forces ugly black borders onto vertical feeds and destroys mobile click-through rates.
Top Tools You Can Use For Effect Maker Tutorial
| Editing Workspace | Software Class | Best Strategic Advantage |
|
CapCut Mobile / Desktop
|
Consumer Layout | Exceptional for beginners; features intuitive one-click linear masks, split screens, and rapid asset keyframing. |
|
Adobe Premiere Pro
|
Professional Suite | Offers absolute control over custom camera-raw color grading, complex multi-layer nested tracks, and fine edge feathering. |
|
DaVinci Resolve
|
Advanced Effects | High-tier node-based masking engines that keep your timeline transitions perfectly crisp across Connected TV displays. |
Best Ideas for Time Travel Videos
- The Past vs. Present Duel: Compare modern items with older ones, such as sliding a mask to reveal a manual typewriter, then shifting into a folding tablet screen.
- The Glow-Up Transformation: Show a dramatic personal evolution by standing in a fixed location, using the slider line to reveal a multi-year physical fitness or career transformation instantly.
- The Historical Twist: Walk down a modern street and use a moving vertical mask to reveal old archive photos of that same place from 100 years ago behind your silhouette.
- Human Behavioral Psychology: Surviving the initial platform seed testing loops requires optimizing your presentation strictly. Editing techniques play a role in YouTube retention and watch time, but they must always serve an immediate purpose. Deliver your visual disruption within the first 2 seconds of the video. Never include long explanations or unedited pauses before the time-travel action initiates.
- Structure Final Frames: It will merge seamlessly into your video’s opening sequence. If your closing phrase flows perfectly into your first sentence on an infinite loop, the muted mobile viewer will watch the sequence a second time before realizing the clip reset, increasing your average YouTube view duration and signaling high satisfaction to the algorithm.
5 Essential Time Travel Sound Effects to Elevate Your Edits
Integrating a dedicated time-travel sound-effect strategy into your timeline provides an immediate sensory bridge, smoothing over the abrupt aesthetic shifts between your past and present video layers.
1. The Low-Frequency Sub-Bass Drop: This asset drops a heavy, resonant sub-bass sweep directly into the timeline. It acts as a physical punch to the viewer, signaling that a massive shift in the universe has just occurred. Place this sound effect exactly at the midpoint of your linear mask animation to ground the visual weight of the transition.
2. The Reverse Cymbal or Audio Swell: A reverse audio wave creates immediate psychological tension. Because it builds in volume backward, it mimics the feeling of time rewinding or a rubber band snapping. Position this effect roughly 10 to 15 frames before your visual transition begins, so the audio peak crashes directly into your new clip.
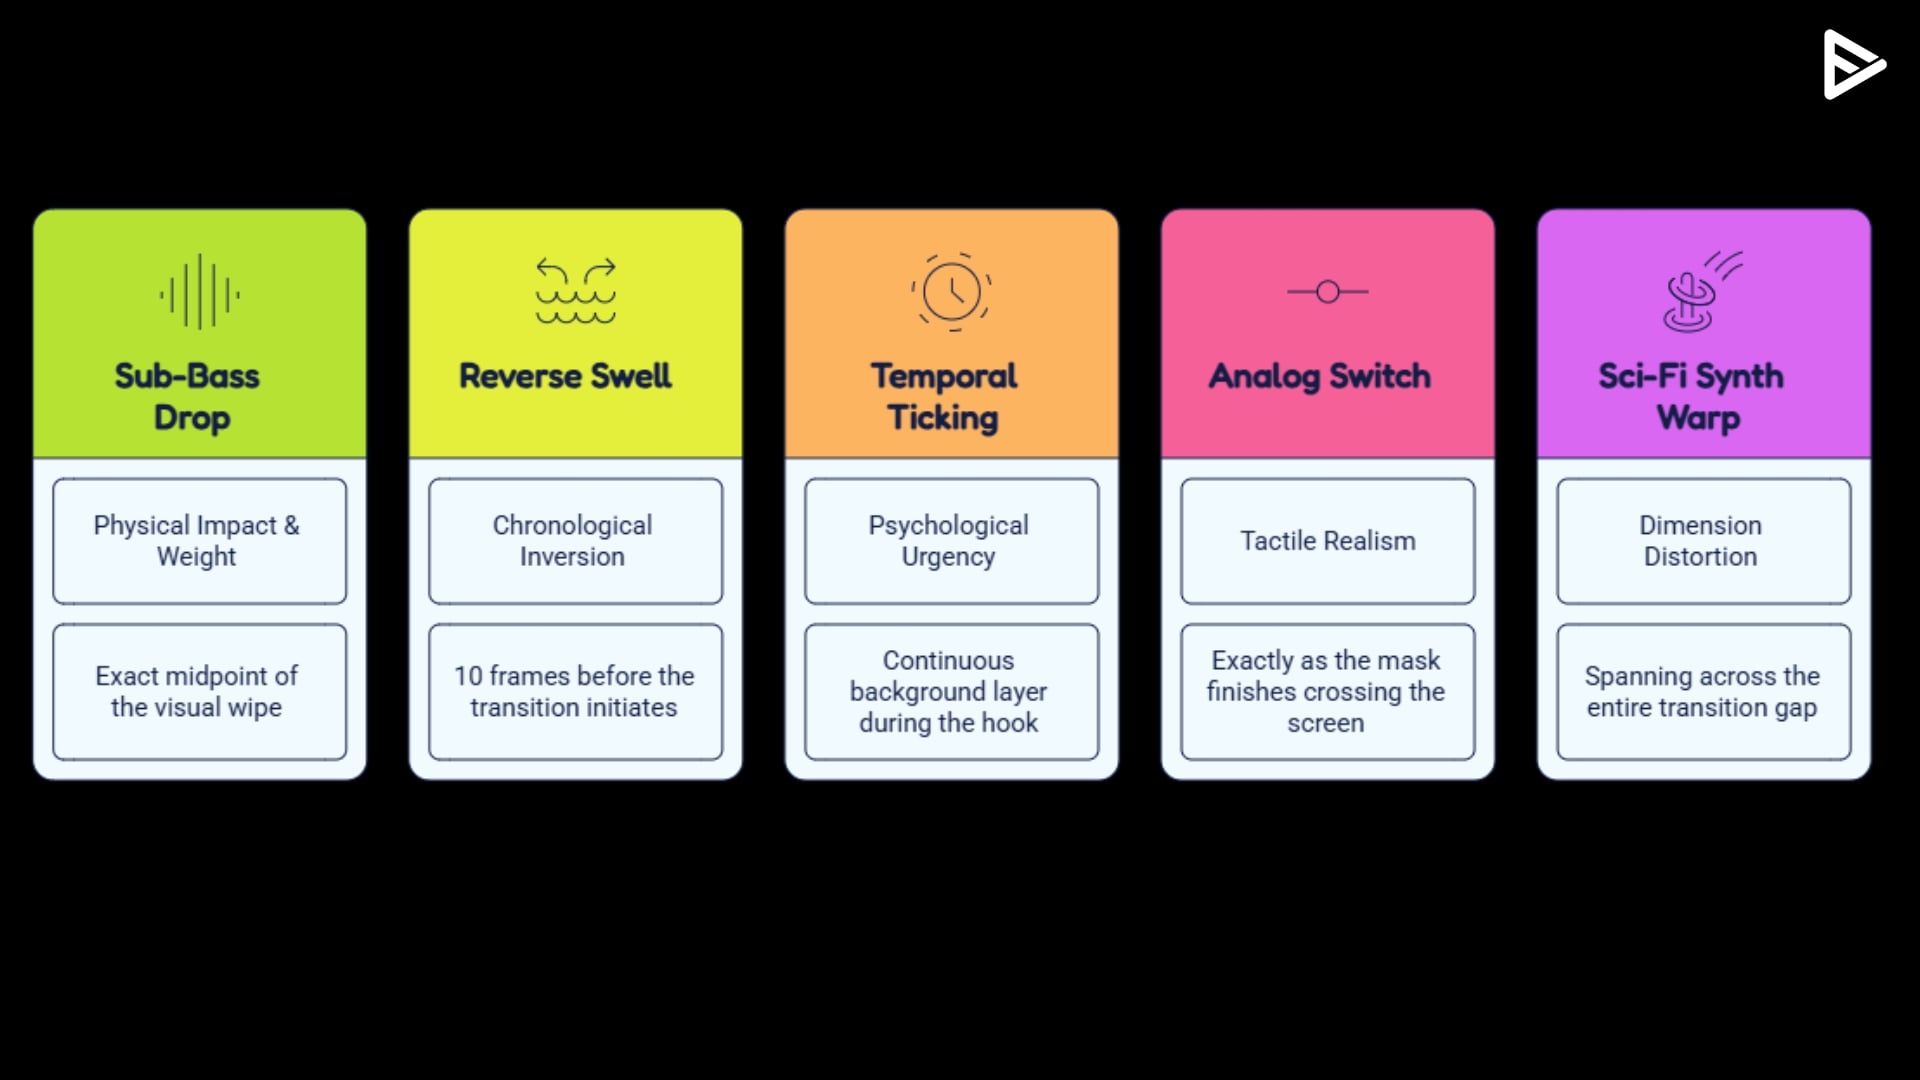
3. The Temporal Ticking Clock: It reminds the viewer’s subconscious mind that time is a finite resource, forcing them to pay attention to what happens next. Use this asset consistently throughout your 3-second introductory hook to accelerate the video’s pacing and keep eyes locked on the screen.
4. The Mechanical Analog Click or Switch: A crisp, mechanical sound like a heavy industrial breaker switch, a typewriter stamp, or an old camera shutter click adds a physical layer to a digital edit. crossing the screen, snapping the audience into the new era.
5. The Sci-Fi Synthesizer Warp: A modulating synth frequency that sweeps upward or downward simulates the distortion of a sci-fi time vortex. It provides the chaotic acoustic texture needed to smooth over a massive wardrobe or environmental change between your past and present video layers.