
We all are so addicted to this social media platform that whenever Facebook Not loading Error happens, we switch to Twitter to know the issue! It is one of the most popular social media platforms, and we cannot ignore its importance in our lives now! It has got us connected to every corner of the world! So here’s what you can do when the Facebook Not loading glitch happens next!
How To Fix the Facebook Not Loading Error?
There are a few methods you can implement to get rid of Fb not loading issue on your desktop or mobile device. These methods are elaborated below:
1. Clear Browser Cache
The browser cache and cookies might be one of the reasons for Facebook not loading properly. Since the cache memory contains a lot of temporary files, it hampers the smooth loading of web pages. Here’s how to clear your cache and cookies on your browser:
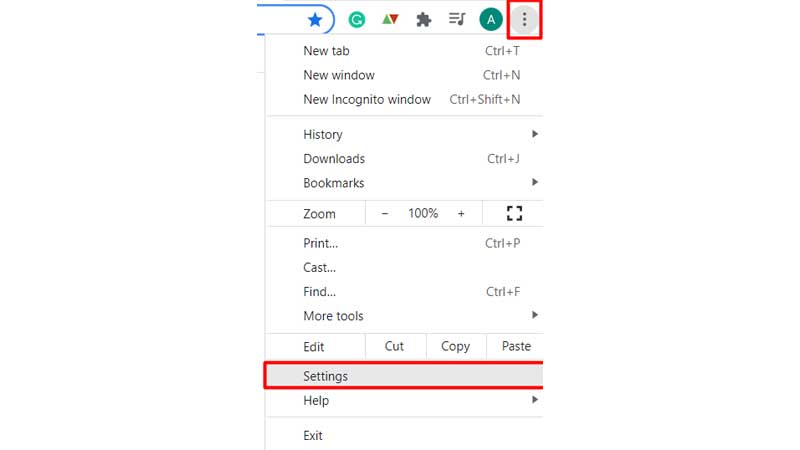
1. Go to “Settings” on your Chrome.
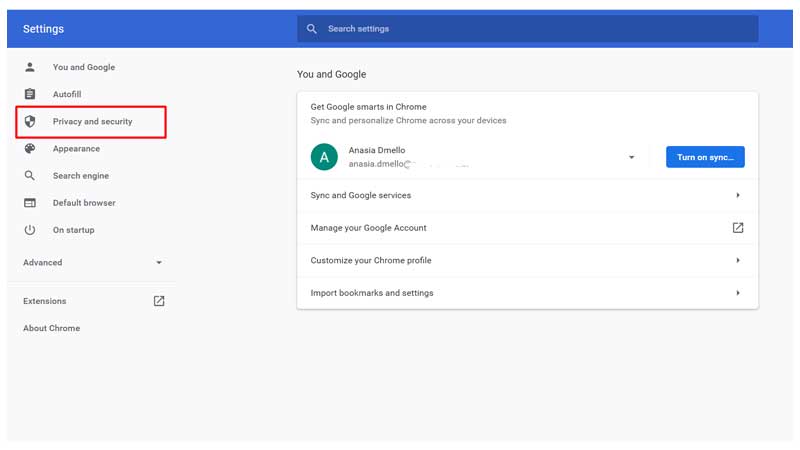
2. Click on “Privacy and security” on the left.
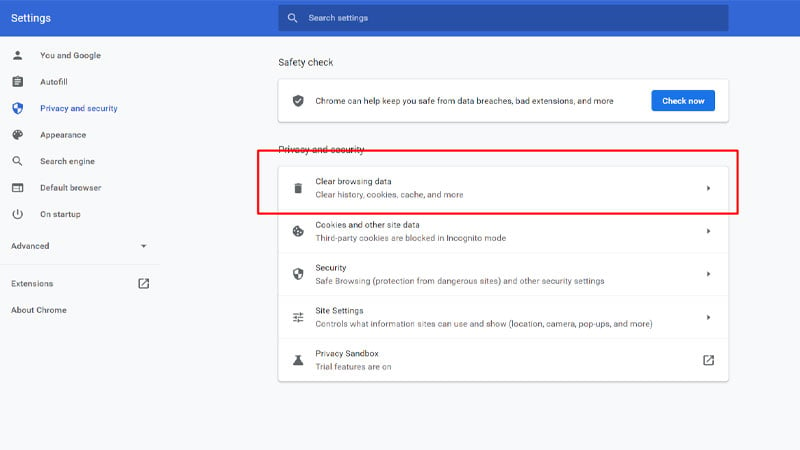
3. Select “Clear browsing data.”
4. Tap on “Advanced” and select the time range as “All time.”
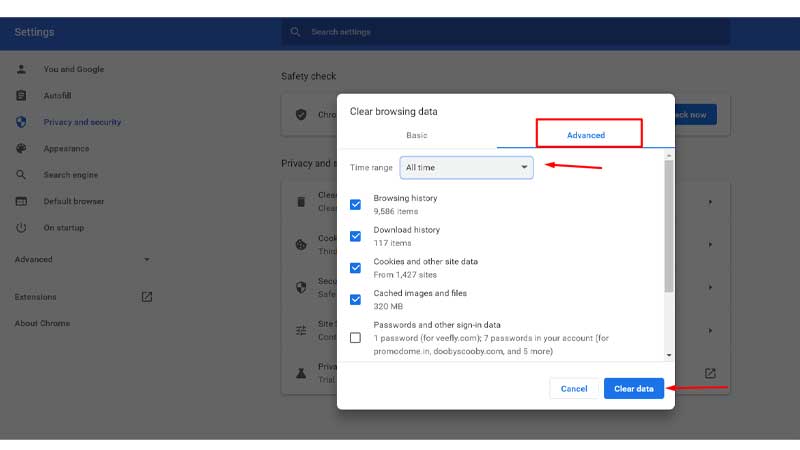
5. Now tap “Clear Data.”
Once the cache is cleared, you can load Facebook on your browser or app without any loading issues. Similarly, clear the cache on your smartphone and then open the Facebook news feed.
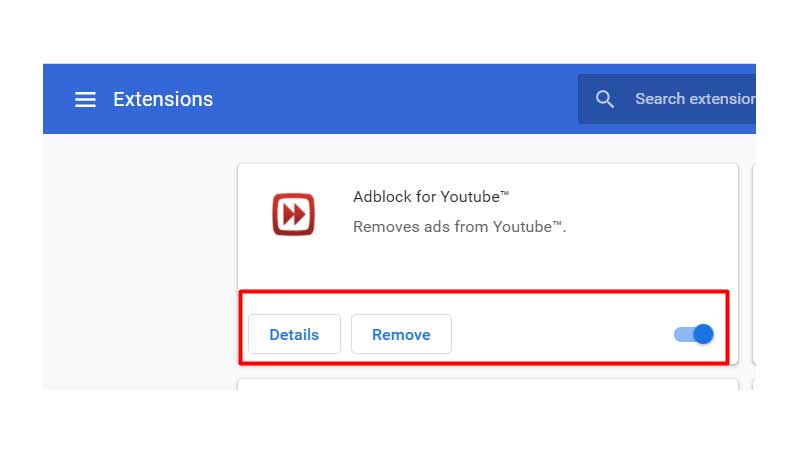
2. Disable Unwanted Extensions
Some extensions on your browser might be one of the reasons for the Facebook page not loading. You can disable your browser extensions temporarily or remove them to use FB smoothly on your browser.
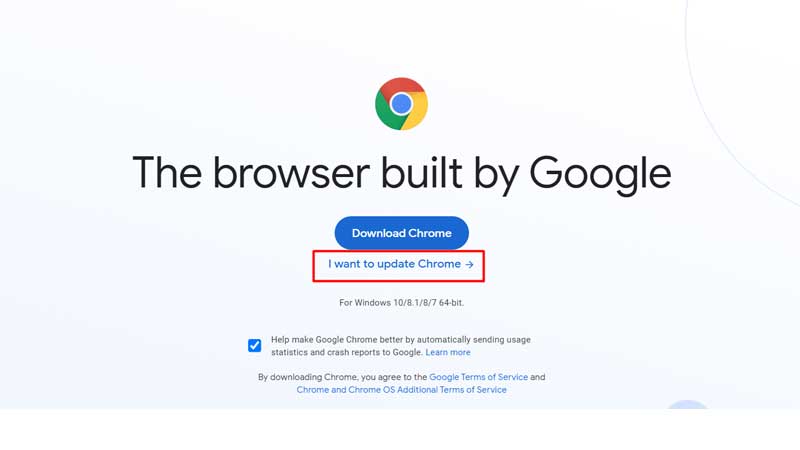
3. Update Your Browser Or Install A New Version
If you are using an older version of your favorite browser, try updating it to a new version. There might be compatibility issues with the Facebook website when using an older browser version. If you are using the mobile app, update the app to eliminate the Facebook won’t load error.
4. Uninstall And Reinstall The Facebook App
The Facebook app on your phone might be having a technical glitch. It could be because of update installs going wrong. Hence you need to uninstall and install the app on your phone.
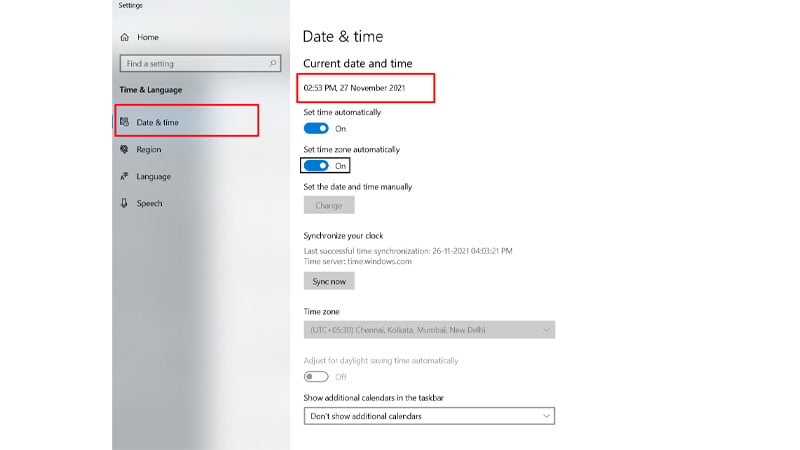
5. Reset Date And Time
Having the wrong date and time on your computer may probably be causing the Facebook not loading issue. Simply correct the date and time of your desktop using Settings and try reloading your Facebook feed. In case you are using a browser on your smartphone, change the time and date settings to enable Fb to load smoothly.
6. Close And Relaunch Facebook App
This is a very basic troubleshooting method you can do to fix the Facebook not loading problem. The operating system of the mobile phone may lag, causing a hindrance in the smooth launching of the Fb app. Closing and relaunching the app gives it a fresh start to load the news feed content on your device.
7. Check If Facebook Is Down
There are sites like Downdetector that will tell you if Facebook servers are down. So if you have tried all the solutions discussed above and Fb not loading error still prevails, then there is definitely an issue on the Facebook server. You can verify whether Facebook is down by visiting the website stated.
Facebook Not Loading Pictures
Sometimes, the Facebook news feed may load without images. In such cases, you can implement the steps below.
Disable the Adblocker
Sometimes adblockers block the images as well, along with blocking the ads. Hence, you need to block the adblocker temporarily and check if the Facebook not loading images error still prevails.
1. DNS Settings
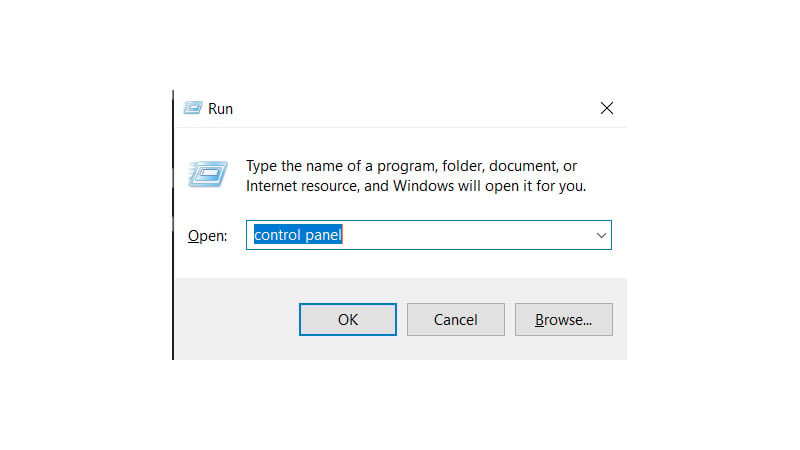
Press the Windows Icon + R at the same time.
1. The Run option opens up; type “Control panel.”
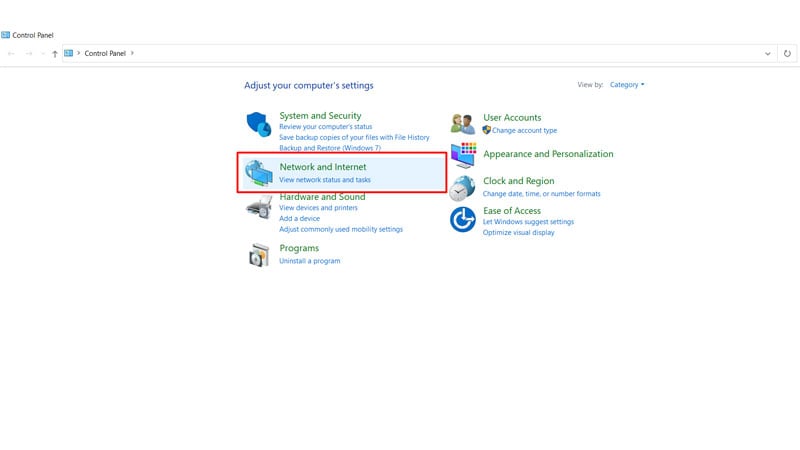
2. Once it opens up, “Network and Internet.”
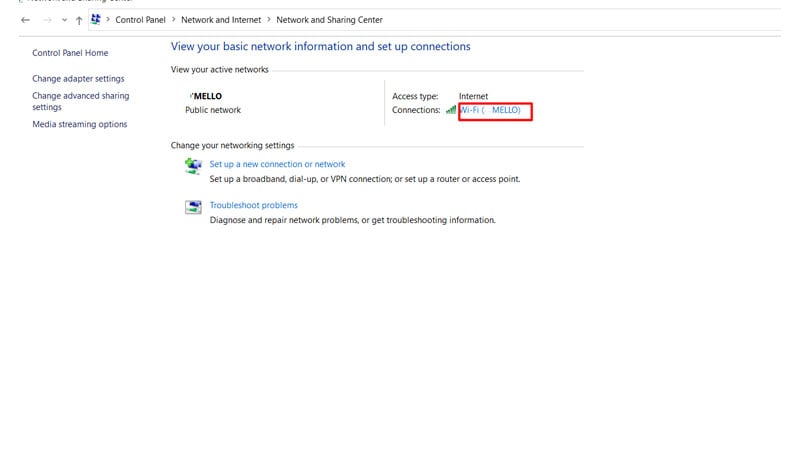
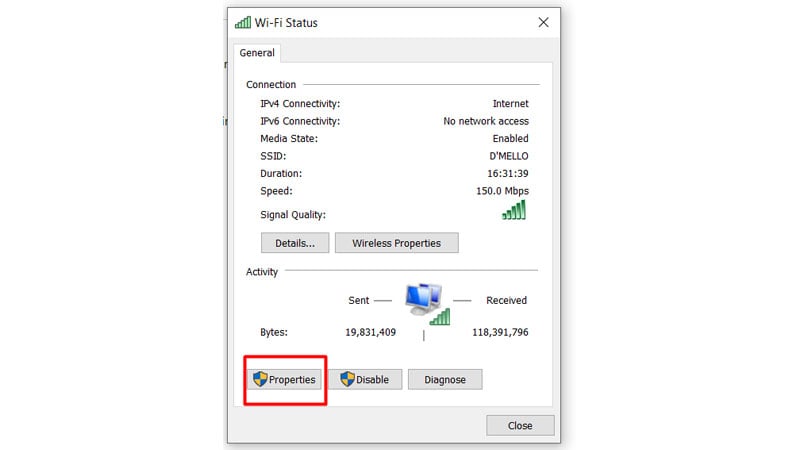
3. Click on the Wi-Fi (Name)
4. Select “Properties”
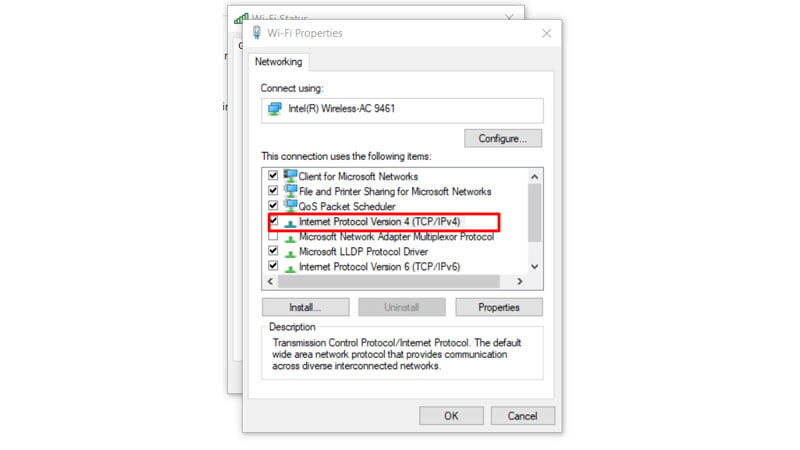
Tap on “Internet Protocol Version 4 (TCP/IPv4)”
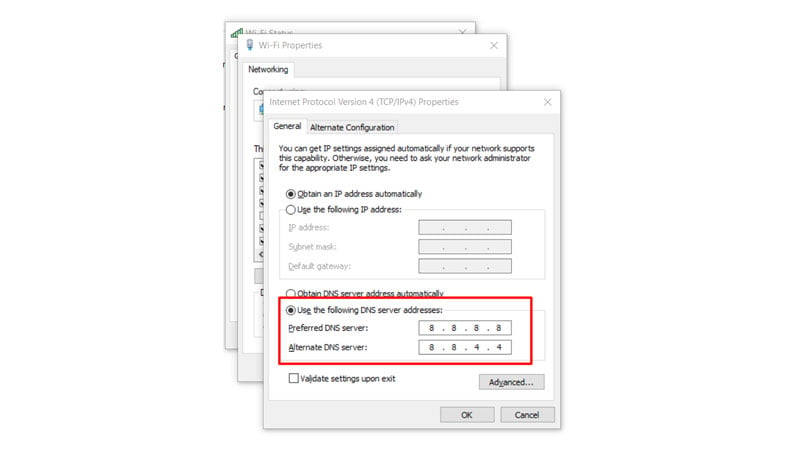
5. Select “Use the following DNS server addresses” and enter the numbers mentioned below:
Preferred DNS server: 8.8.8.8
Alternate DNS server: 8.8.4.4
6. Finally, click on “OK.”
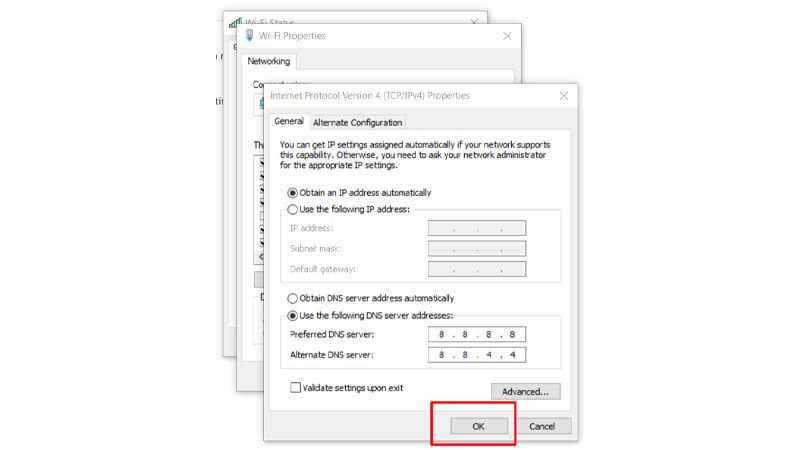
Now you need to restart your system, check if the Facebook images not loading still appear.
2. Browser issues
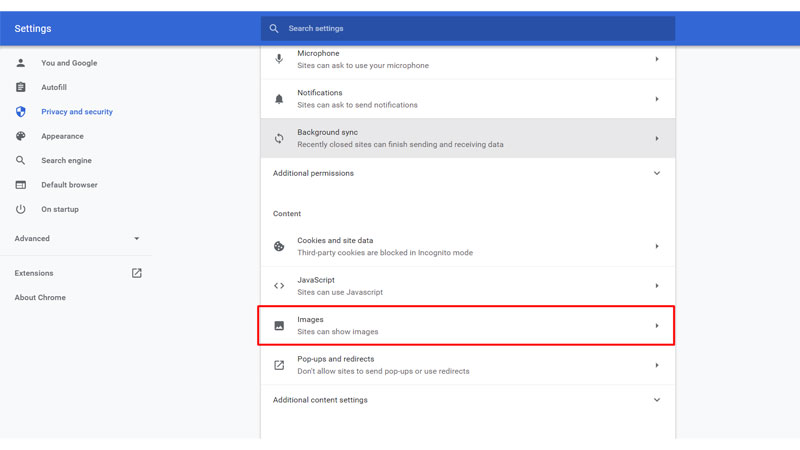
Sometimes there are some settings in your browser that do not allow you to view images. Hence you need to check the settings on your Chrome. Here’s how you need to enable the images option on Chrome:
1. Open Settings on your Chrome
2. Click on “Privacy and security” on the left side.
3. Select “Site Settings”

4. Tap on “Images”
5. Click on “Sites can show images.”
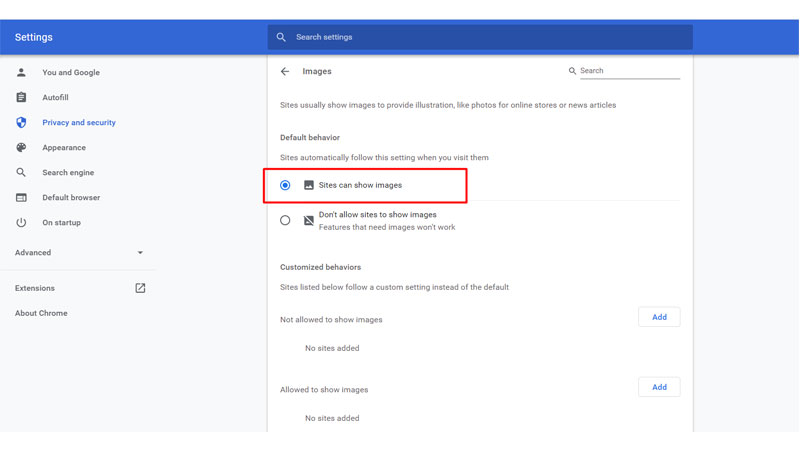
Also, check if you have added a site to the list that says “Not allowed to show images.”
Conclusion
Now that you know why the Facebook Not loading error is happening, you can try all the solutions. This comprehensive guide can be handy in resolving the issue if Facebook will not load next time and give a hassle-free Facebook browsing experience.
Frequently Asked Questions
Q1. Why Facebook Is Not Working Properly?
There may be a problem with your internet connection. If you are connected to a Wi-Fi connection, you need to check if your device is connected to the Wi-Fi. If you are using the phone data, then check if it is on.
Q2. How Do You Fix Facebook When It’s Not Working?
You can implement the following steps to potentially solve the issue.
- Try opening Facebook in incognito mode.
- Change your browser.
- Disable the VPN or extensions.
- Reboot your device.
Q3. Does Facebook Have Live Chat Support?
Unfortunately, Facebook does not have live chat support. It is only available for business accounts.
Q4. How Do I Clear My Facebook Cache?
You need to follow these steps to clear the cache on your phone.
- Go to your phone “settings.”
- Click on “Apps”
- Select “Manage Apps”
- Tap “Facebook”
- Click on “Clear data.”
- Now, select “Clear cache.”