
Capturing perfect footage and infusing it with the right audio is a challenge in itself. Being a content creator, you must have come across situations where you might have captured an amazing video but trying hard to separate the audio and reassemble it in a way you want. This article will guide you on how to remove audio in Premiere Pro while editing your video and re-edit them accordingly. We also cover other platforms from where you can remove audio from videos and bring your vision to reality.
Remove Audio From Video In Premiere Pro
If you use Premiere Pro for video editing purposes, you can modify the footage as soon as it is imported into your device. Follow the steps below to separate tracks and remove audio from video files.
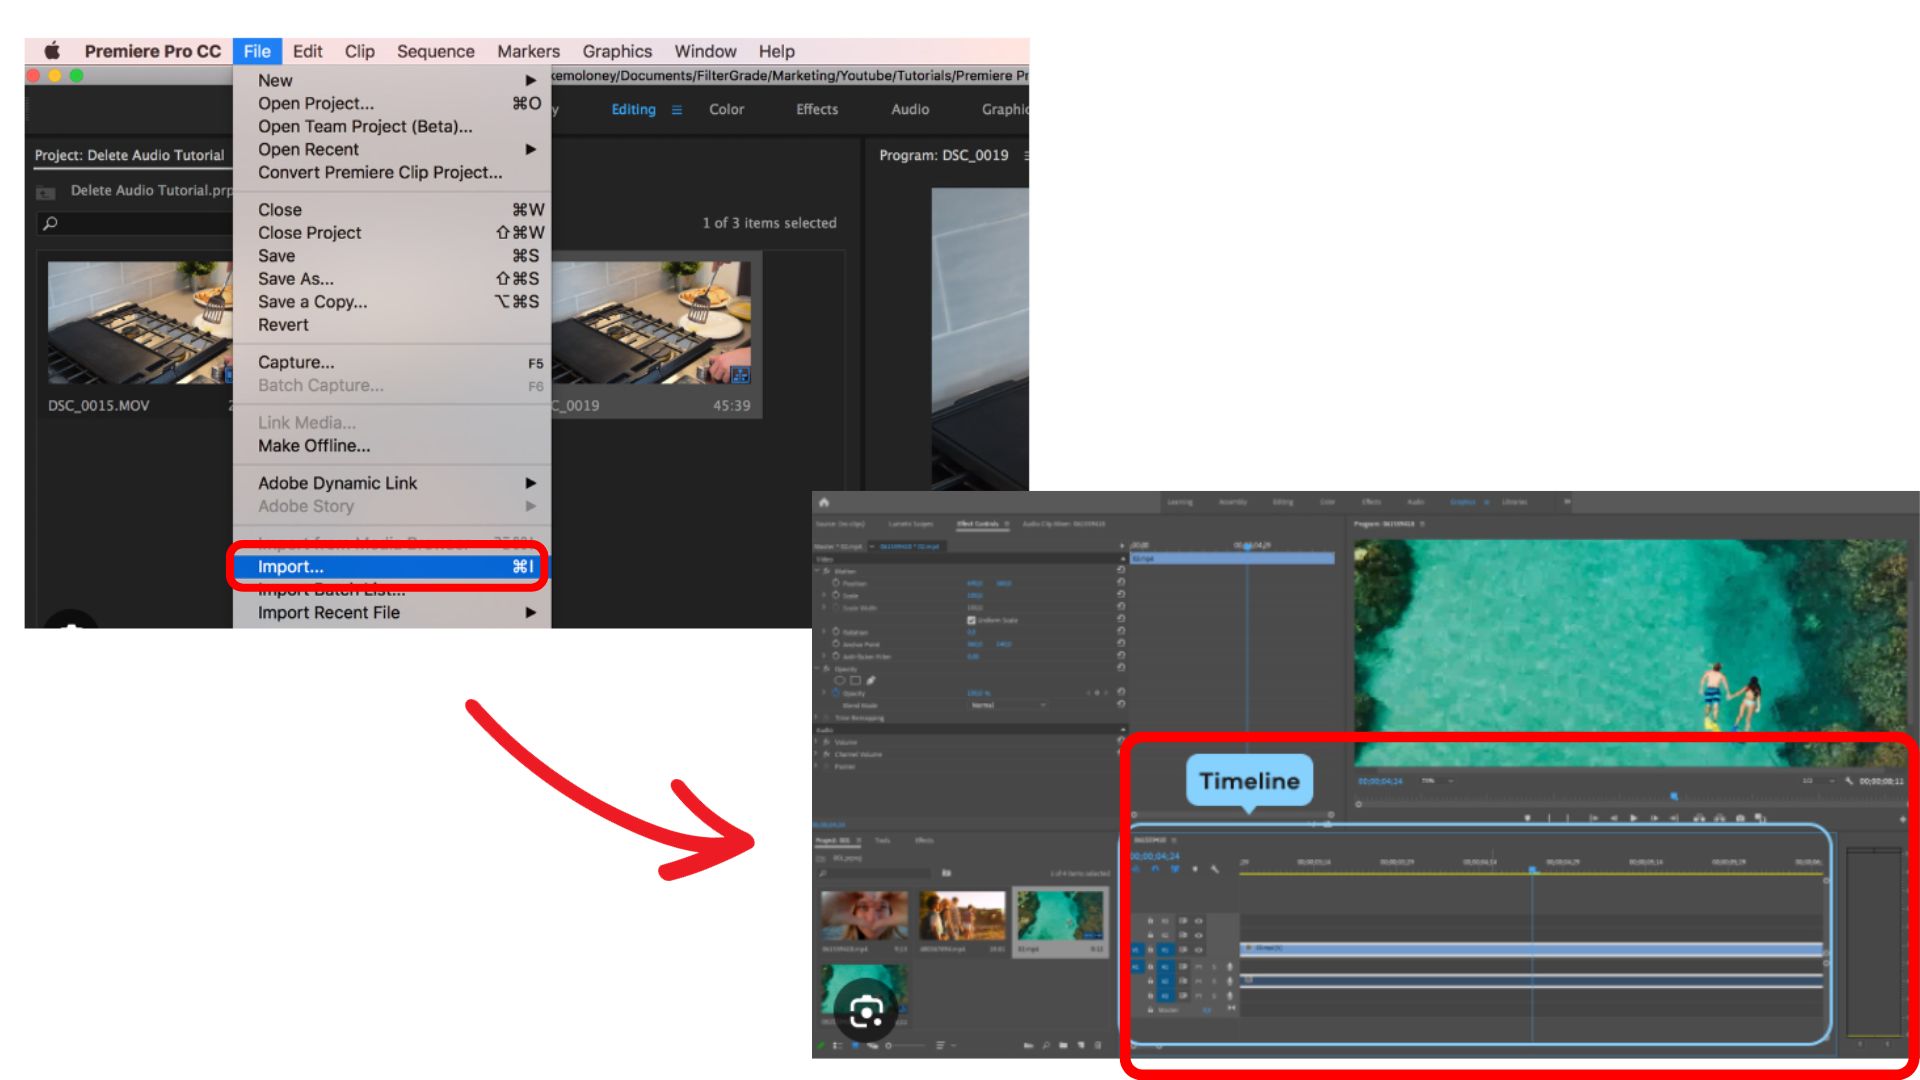
1. Open the dashboard and import your clips into the new project. You can drag them or upload them from your device.
2. Drag the clips from the dashboard into the timeline.
3. Right-click on each clip and select the Unlink option. This separates the video and audio elements.
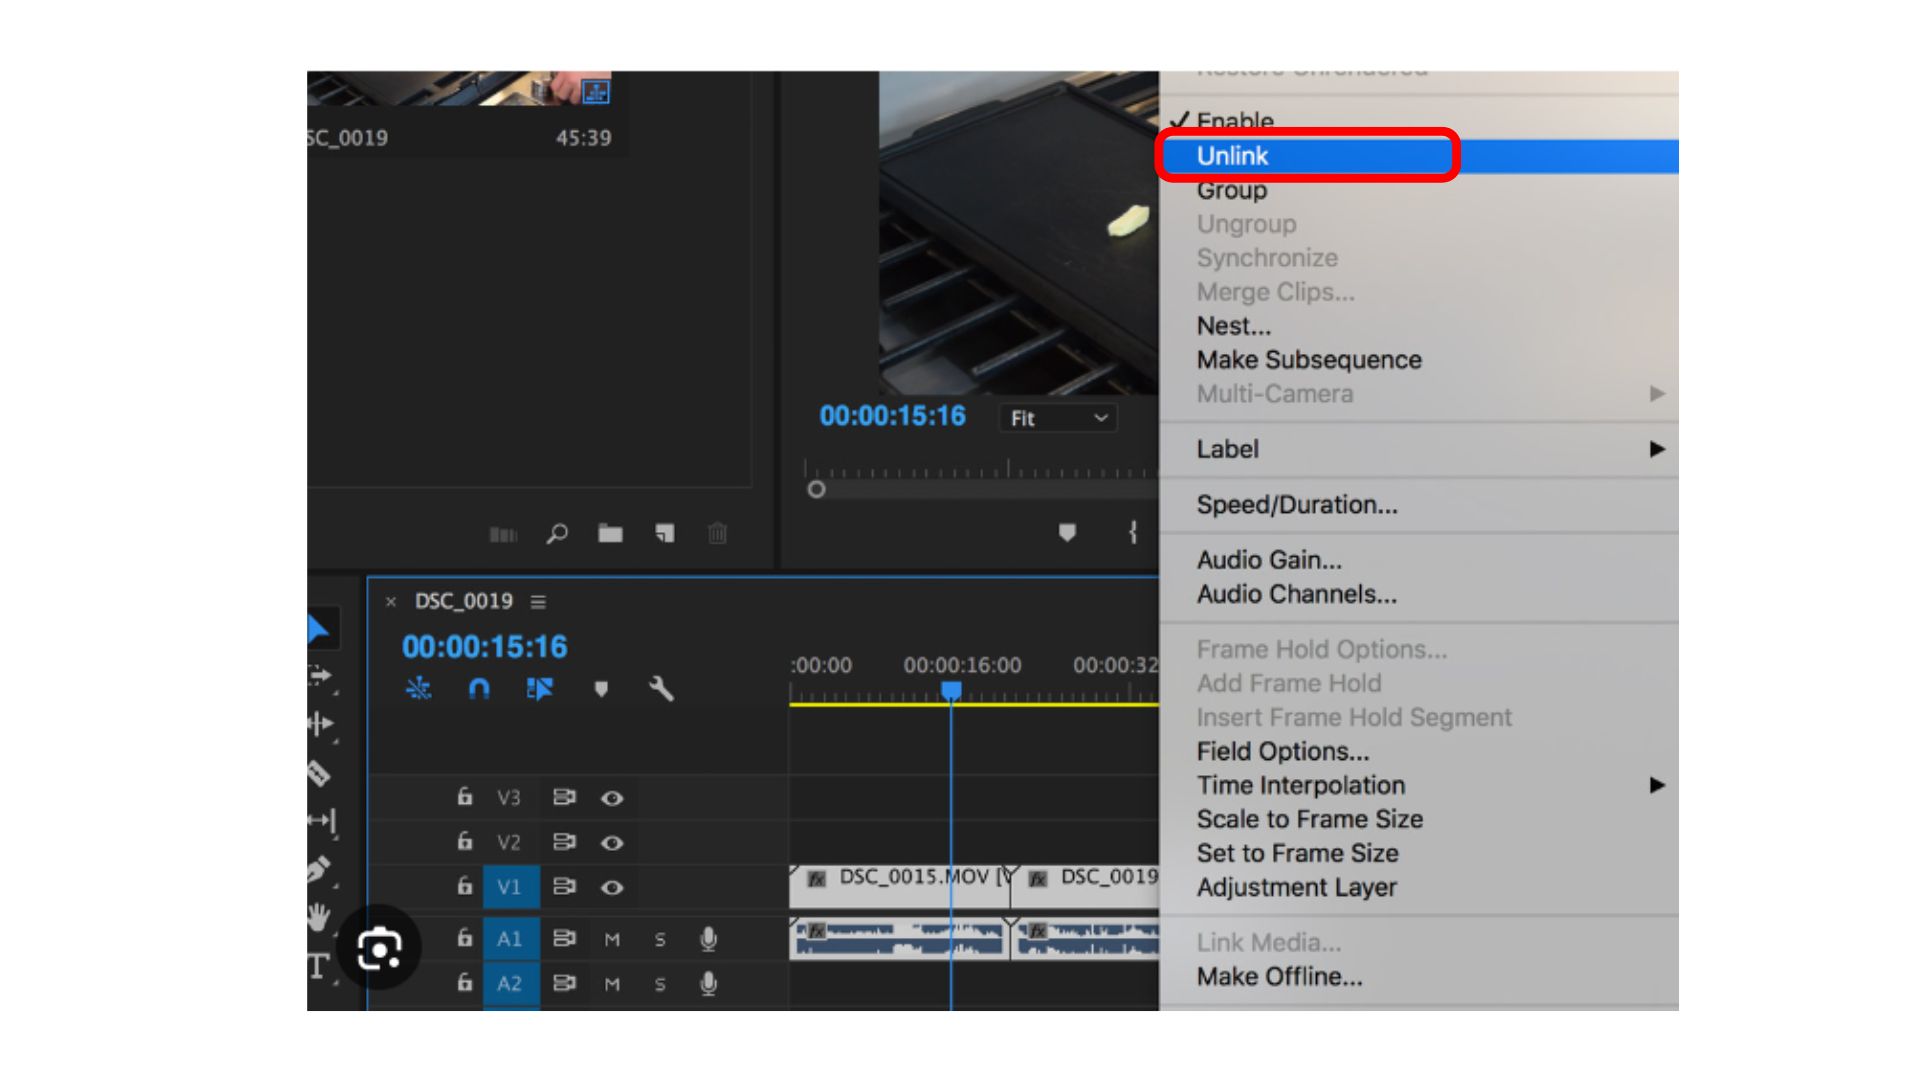
4. Go through each element of the audio and simply press delete for the audio you wish to remove.
Why Should You Remove Audio From Video?
There could be many reasons why you should remove audio from video in the editing stage. Separating these two elements gives you greater liberty in giving life to your ideas and creating your perfect footage.
For example, you might have shot a music video and wish to edit it more closely to match the lip sync. Separating the audio and video elements helps you gain a closer look and provides more precision for editing.
Maybe you are creating a documentary and wish to add voice-over to a sequence. Remove the audio from the video footage and recap the events as a narrator by adding your voice-over, giving you a firm grasp of the editing process.
Let’s explore other platforms where you can remove audio from video, including smartphones and desktops.
How To Remove Audio From Video on iPhone?
You might prefer shooting videos from an iPhone and then posting them on your social channels. You can use the photos app on your iPhone to remove the audio track before going ahead with the editing process. Follow the steps below to remove audio easily.
- Tap the thumbnail and open the video
- Tap on the ‘Edit‘ option in the top right corner of your screen
- A yellow speaker appears in the top left corner, right above your video preview. Tap it to remove the audio track from the video footage.
- Tap ‘Done‘ in the bottom right corner and save your changes.
How To Remove Audio From Video On Mac?
Quicktimeplayer is a very helpful app for removing audio from video files. Execute the three steps below to remove audio from video files using a Mac.
- Open the Quicktime Player app on your Mac.
- Navigate accordingly to open the video file from which you wish to remove sound.
- Click on the Edit menu and select Remove Audio. This action will separate the audio element from the video file.
Remove Audio From Video On Windows
If you use a Windows PC for editing purposes, you can use Windows Movie maker to cut and save videos without the audio element before you edit them further.
- Open Windows Movie Maker and import the video you wish to edit
- Select the ‘edit’ option from the Video Tools Ribbon
- Go to left-hand side of the menu bar under the video volume tab. Drag the slider completely to mute the audio.
- Save this version of the video as a new file.
Remove Audio From Video Files Using Android
In case you use an Android device, you can save videos without audio using the Google Photos app. Follow the steps below:
- Upload your video to Google Photos and open the video by tapping the thumbnail.
- Tap on ‘Edit‘ from the menu at the bottom of the screen.
- Tap on ‘speaker‘ on the bottom left. It will first turn blue and then appear crossed out.
- Once done, tap ‘Save Copy‘ in the bottom right corner to save a new version of the video without audio.
You can also explore the highly preferred mobile apps for on-the-go video editing.
Conclusion
Now that you know how to remove audio in Premiere Pro and other platforms, go ahead and execute the steps outlined in this article. When you implement the ideas illustrated above, you will notice more flexibility and greater creativity infused in your videos. With the Premiere Pro app, you can add inbuilt audio tracks or your own music to your video. The choice of audio depends on the type of your video content, like Vlogs, documentaries, travel, etc.
Frequently Asked Questions
Q1. What Is The Size Of The Video That I Can Choose In Premiere Pro?
You can choose video files up to 20GB in size and up to 1 hour long in duration.
Q2. Can I Remove The Original Audio and Add Another Audio Using Other Third-Party Video Editing Apps?
Yes. Not every third-party app provides this feature of removing the audio from video files. However, there are a few DIY apps like Premiere Pro that offer you a full suite of video editing features.
Q3. Does Removing Audio Feature In Premiere Pro Benefit the Video Editing Process?
Yes. Separating the audio from video files gives you a crystal-clean canvas to give birth to your creative ideas and capture the perfect video footage.